How to configure the issue search results list
You can configure the search results list: sort or group issues, choose columns with issue parameters, and display the issue hierarchy.
Changing the table columns
Search results are presented as a table with issue parameters, such as Key, Issue, and Assignee. You can add parameter columns to the table or remove unnecessary ones.
Adding or removing columns through the table settings
To quickly find an issue in a filtered list, type text in the Search by issue name field.
You can customize the list with search results: sort or group issues, select columns with parameters. For more information, see How to configure the issue search results list.
Open the issue list with extended search capabilities: click Issues → Show all or go to https://tracker.yandex.com/issues .
To search by a local field of a specific queue, enter the queue key and a dot before the field name (for example, DEVS.Tester). For more information about local fields, see Local issue fields.
Several actions are also available inside the drop-down list. To see them, hover over a parameter:
-
To read a brief description of the issue parameter, click .
-
To keep the selected parameter always within quick reach, click .
The Pinned category appears at the top of the drop-down list. -
To change the order of the selected columns, drag them in the list by the icon.

Moving or pinning a selected column from the table header
- Hover over a column heading.
- Click the icon on the right.
- Select an action from the drop-down list.
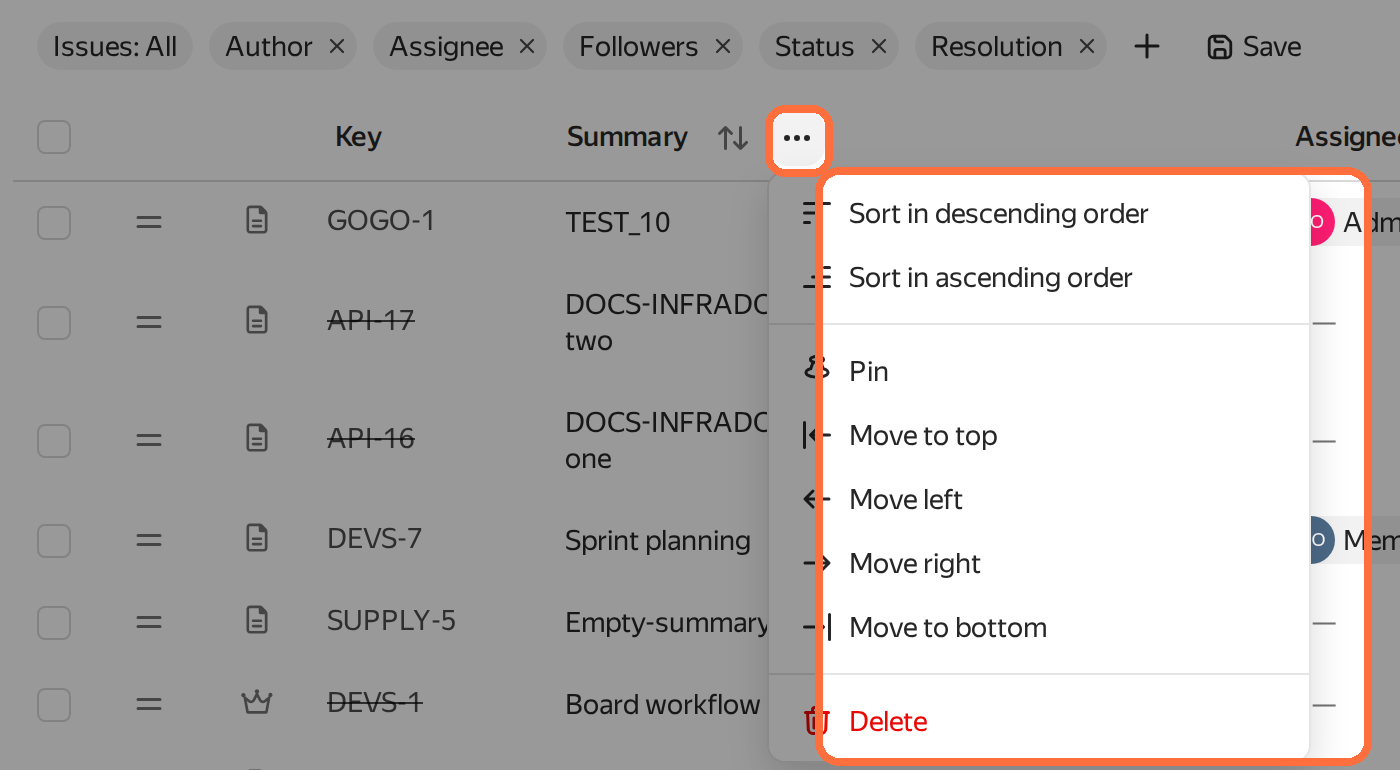
You can also change the column order by dragging columns directly in the issue list. To do this, hover over a cell with a column heading. When the pointer changes, hold the mouse button and drag the column to a new position.

Adding columns from the table header
To add a new column from the table header:
- Hover over the border between columns in the table header.
- Click the button that appears.
- Select the required parameter from the drop-down list.
If you have permission to configure queues, click the Create field icon to create a new local field.
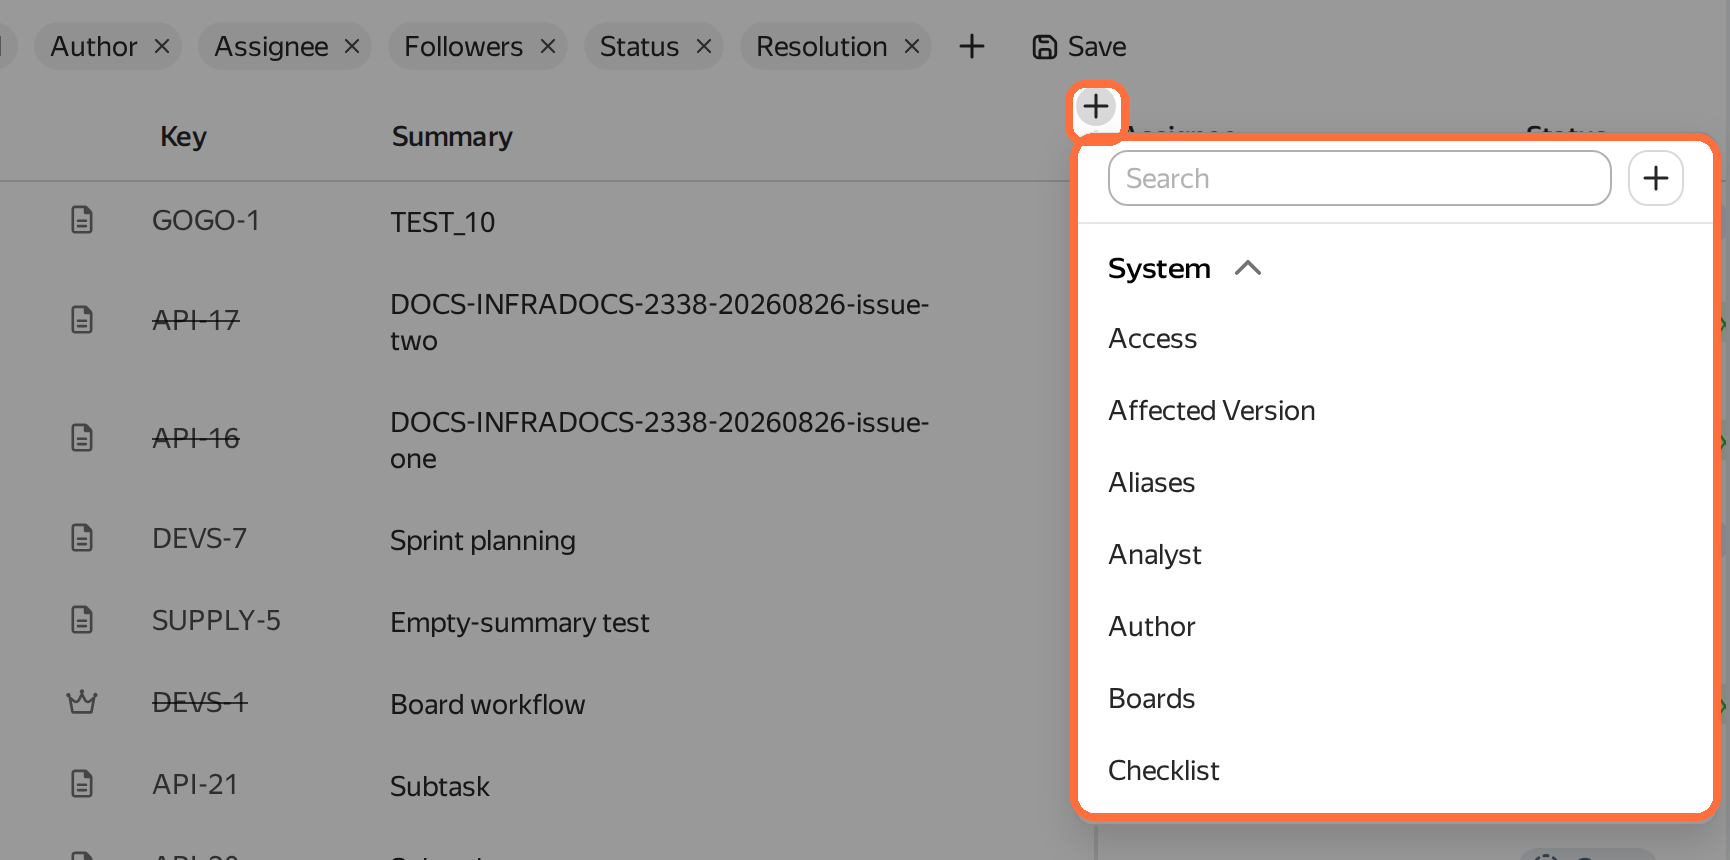
The added column appears in the selected location in the table.
Changing an issue parameter value
You can edit the parameters shown in the cells of the search results table.
- To change the issue status or priority, a responsible user (for example, the assignee), or a date (for example, Deadline), click the current value and select a new one from the drop-down list.
- To change the issue name or another text field (for example, Story Points), hover over it and click on the right.

Sorting the issue list
By default, the issue list is sorted by update date. To set a new sorting parameter (for example, by descending start date), use the button at the top of the page:
- Click the icon to change the sorting direction: descending or ascending.
- To the right of the icon, click the name of the current sorting parameter and select a new one from the drop-down list.
You can quickly sort the list by a parameter from the table: hover over a column and click the icon.

Grouping the issue list
You can divide the issues in the search results into groups, for example, by assignee. To do this, click No grouping at the top and select a grouping parameter from the drop-down list.
Displaying the issue hierarchy
Enable hierarchy mode to arrange issues in a tree based on Parent issue — Sub-issue and Epic — Issue links. This mode is available on the search results page and in issue lists on queue and project pages.
At the top of the list, click Hierarchy. Tracker remembers the selected mode for this page.
Issues with sub-issues display an expand icon. Click it to show or hide child issues. You can use hierarchy mode together with issue grouping. Tracker first divides issues into groups, then builds a hierarchy within each group.
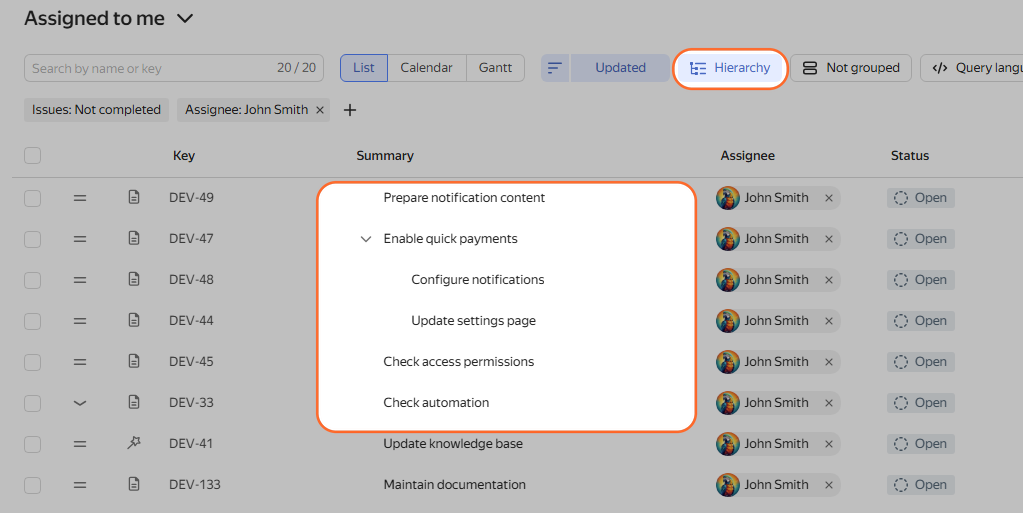
- To create a sub-issue, hover over the parent issue and click Add sub-issue:
- To create a new sub-issue, go to the New issue tab, enter a name, and press Enter.
- To add an existing issue, go to the Existing issue tab. Enter its key or name, then select the issue from the list. The key is displayed above the title on the issue page, for example,
TEST-1234.
- To assign another parent, drag the issue onto the issue you want to make its parent.
- To remove the parent link, drag the sub-issue to the top level of the list.
Dragging issues in hierarchy mode changes issue links, but not their order at the same level.
A link is a formatted reference from one issue to another. It shows the dependency between issues. For example, add a Dependent issue — Blocks link if the work cannot be done until the previous stage is completed.
An issue key is a unique identifier contained in the issue link. It consists of the queue key and a number, for example TEST-123.