How to plan workload in a project
Workload planning in a project helps a manager distribute tasks among participants in advance, realistically estimate the project's completion date, and monitor who is working on what and when. This makes it easier to avoid overloading some employees while leaving others without work, and to notice in time when tasks are at risk of missing the deadline.
You can plan the workload on the project page: go to the project page and open the Resources tab. On the resource diagram, employees are listed in rows, and issues are shown as bars on a timeline.
To plan workload in a project:
- Add assignees to the project.
- Add issues to the plan and set effort estimates.
- Distribute issues among assignees.
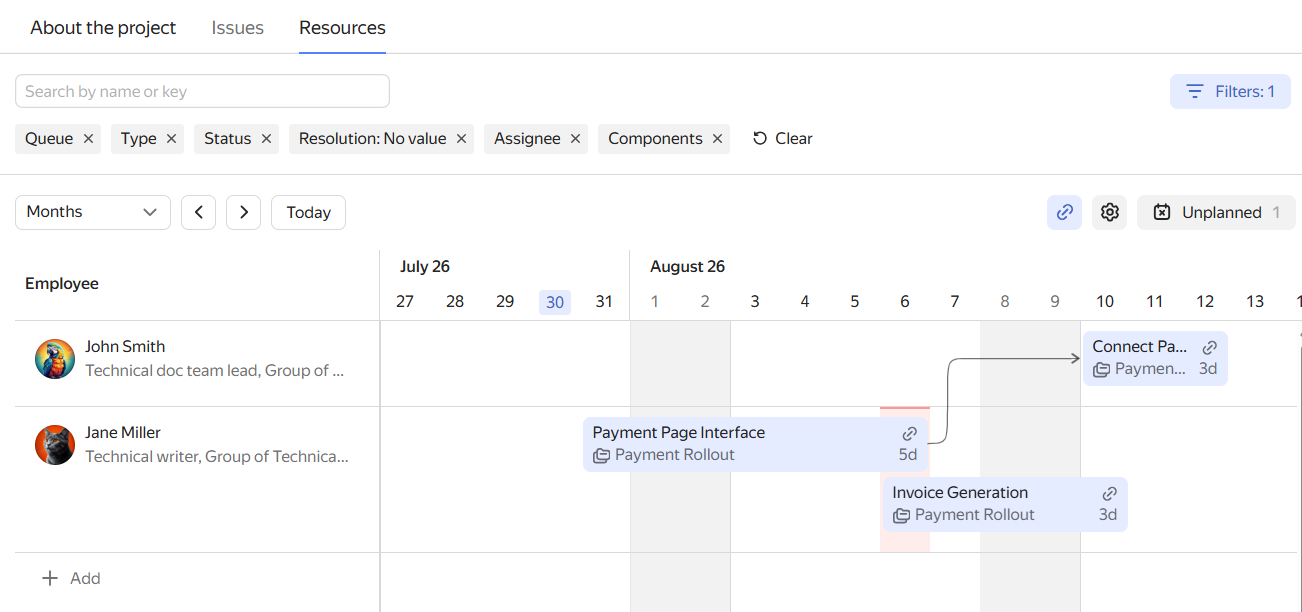
Project's Resources tab
Add assignees
-
In the Employee column to the left of the diagram, click Add.
-
Start typing an employee's name and select them from the list. You can select multiple employees at once.
-
Click Save.
Each added employee will appear as a separate row on the resource diagram.
Add issues to the plan
For an issue to appear on the resource diagram, estimate how much time is needed to complete it. You can do this on the Unscheduled tasks panel or by filling in the estimate field on the issue page.
After that, you can move the issue to the diagram by selecting an assignee and start and end dates.
If an issue is added to a project, it won't appear on the Unscheduled tasks panel if its Issue estimate field is empty.
Add an issue on the Unscheduled tasks panel
-
Above the resource diagram, click Unscheduled. The button shows how many issues are not yet distributed.
-
On the Unscheduled tasks panel, click Add issue.
-
Select which issue to add:
- New — enter the name of a new issue.
- Existing — specify the key or name of an issue that already exists in Tracker and select it from the list.
-
Fill in the estimate fields:
- Issue estimate — the total time needed to complete the issue. For example,
3н 4д 6ч. - Hours per day — how many hours per day the employee will spend on this issue.
- Issue estimate — the total time needed to complete the issue. For example,
-
Click Add.
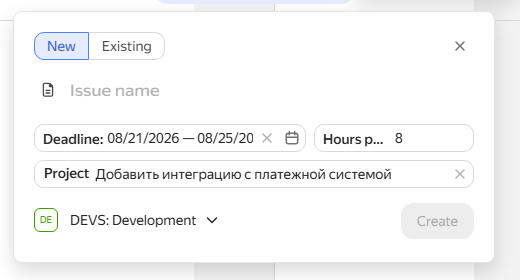
The issue will appear on the Unscheduled tasks panel.
Set an estimate on the issue page
You can also set the effort estimate on the issue page:
-
Open the issue page.
-
In the right panel, click Time Tracking and fill in the Overall task estimation field. For example,
3н 4д 6ч.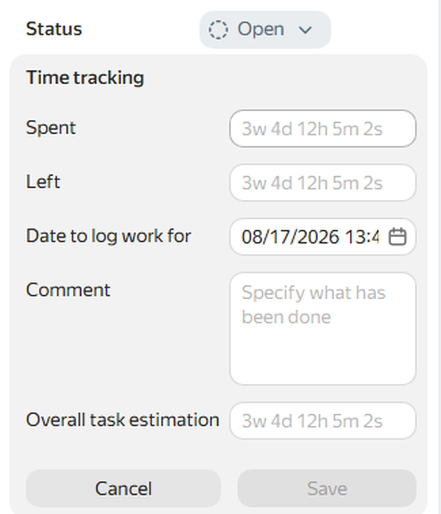
If the Overall task estimation field is not displayed, enable it in the queue settings under Time Tracking. How to configure time tracking
-
You can also set parameters on the issue page that affect how the issue is displayed on the diagram:
- The Hours per day field in the Time Tracking block — how much time per day the employee will spend on the issue.
- Start date and Deadline — determine the start and end dates of the issue on the diagram.
If the estimate is set and the issue is added to the project, it will appear on the Unscheduled tasks panel or on the resource diagram.
Distribute issues among assignees
You can schedule work in two ways:
-
Drag an issue card from the Unscheduled tasks panel to the row of the desired employee. The issue will become a bar on the timeline.
-
Add an issue directly on the diagram.
To add an issue on the diagram:
-
On an employee's row, hold down the left mouse button and drag a bar over the desired time period.
-
Select which issue to add: New or Existing.
-
Specify the issue's completion dates and the time planned to be spent on the issue per day.
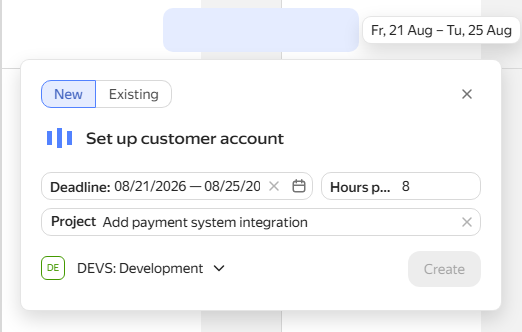
After placing issues on the resource diagram, they are also displayed on the Gantt chart and in the calendar view of the issue list.
How to view the project resource diagram
When you hover over an issue bar, a tooltip displays its name, project, dates, and estimate.
Issue dates on the diagram
The position and length of the bar on the diagram are determined by the issue's fields:
- Start date — the left border of the bar;
- Deadline — the right border of the bar.
If these fields are not set, when the issue is moved to the diagram, the dates are calculated automatically based on the estimate and the Hours per day value.
To change an issue's completion dates, drag the right or left border of the bar on the diagram. You can also edit the Start date and Deadline fields on the issue page.
Color codes
The color of the issue bar indicates whether it belongs to the current project:
- If the bar is blue — it's an issue from the current project.
- If the bar is gray — it's an issue that is not part of the current project (for example, the assignee is working on issues in other projects). These issues are displayed so you can account for the employee's total workload.
If an employee's total workload exceeds their available working time in any period, that interval on the timeline is highlighted in red — even when the overload consists of issues from different projects. This lets you immediately see which days the employee is overloaded and reschedule some work for another time or assign it to another person.
Leaves, sick days, and other absences
You can display periods when an employee is unavailable, such as leaves, sick days, and others, on the diagram. Consider these when planning to avoid assigning issues for times when the employee is not working.
You can submit absence data via the API. To do this, use the POST /v3/gaps method. Once submitted, absences will appear on the resource diagram and on employees' avatars.
How to configure the diagram view
-
To change the timeline scale, select Months or Quarters from the drop-down list above the diagram.
-
To navigate the timeline, use the arrows. To return to the current date, click Today.
-
To find an issue, use the search bar for name and key above the diagram.
-
To filter issues by parameters, click Filters on the right and set conditions (queue, type, status, resolution, assignee, components). To clear the conditions, click Reset.
-
To see blocking links between issues on the diagram ("blocks" or "depends on"), click Show all links.
Links are shown as arrows. If a dependent issue on the diagram starts earlier than the completion date of the blocking issue, the link is indicated by a red arrow.
To view the links of a single issue, hover over it and click the icon.
-
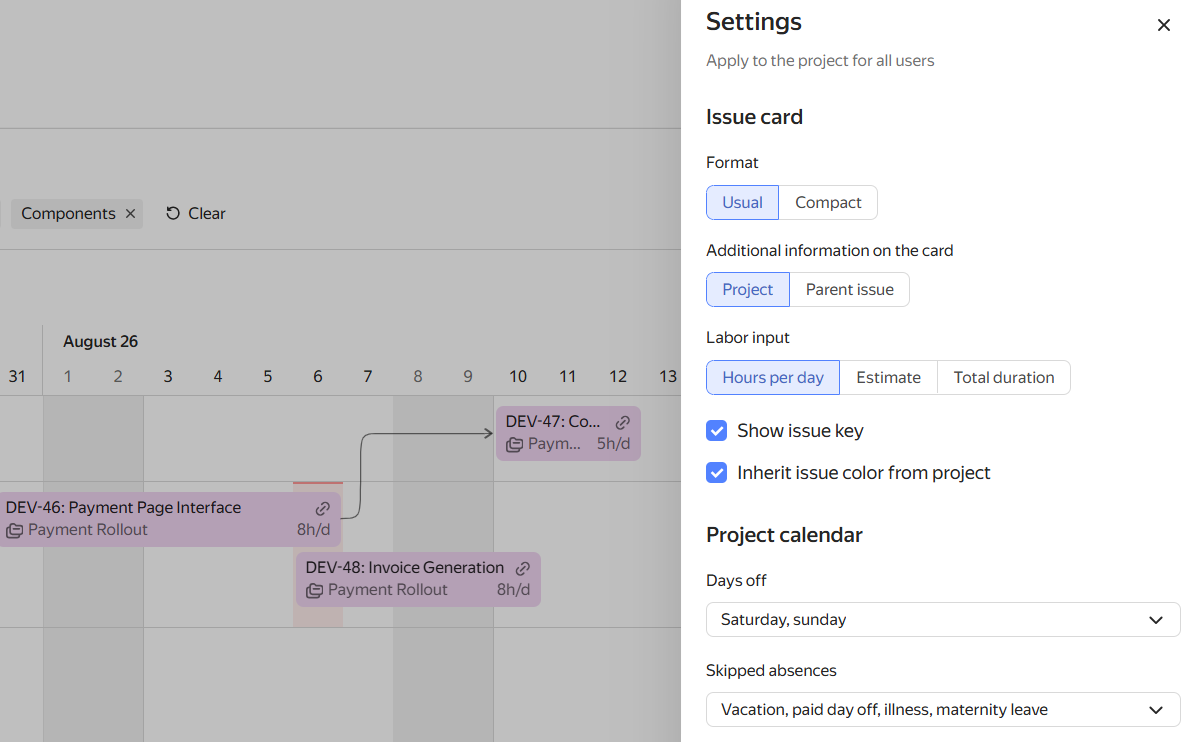
To configure the issue view on the diagram, click Settings and set the parameters:
- Format — usual or compact card view. In the compact view, additional information on the card and labor input are not shown.
- Additional information on the card — what to show under the issue name on the card: project or parent issue.
- Labor input — show in the format: hours per day, overall estimate, or total duration.
- Show issue key.
- Inherit issue color from project.
- Project calendar — set days off and types of employee absences when they are not working (for example, vacation, paid day off, illness, maternity leave).
These settings apply to the project for all users.
An issue key is a unique identifier contained in the issue link. It consists of the queue key and a number, for example TEST-123.